

widomski
-
Posts
32 -
Joined
-
Last visited
-
Days Won
1
Content Type
Profiles
Forums
Events
Gallery
Blogs
Everything posted by widomski
-
Picked up this wheel the other day for $28. Feels much more solid than the crusty sports wheel I had. Also picked up a bigport 4age out of an AE82 (late to the 4age game much?) Spent two(!) days with a mate taking it out and getting it home. Took the inlet manifold, ECU, igniter/coil, and any sensor I could see. Going back on Wednesday to get the loom. How it got home: How it came out: Took two cans of degreaser and two goes with the pressure washer to get to this: Inlet manifold is saturated with oil but spark plugs look OK: Inside the cam covers look yucky: This will be a back burner project as I get the rest of the parts and do my research on how it all should go together. Got a lot of reading up to do...


-
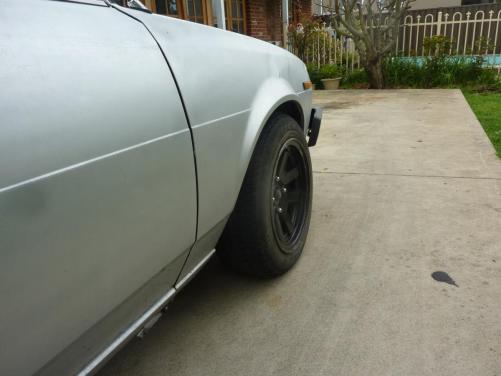
Bought some MA61's the other day as I was getting real tired of how my car handled in the wet with the pizza cutter CSX alloys. Rear tyres are borked and am looking at options. Seems like theres not much in 195/60/R14. Might give the used tyre place a buzz. Fronts are 185/60/R14 Pirelli P6's (?) and handle well in the wet. Looks way, way better now. Fog lights were NOS Mazda items I picked up at Cashies for $20.


-
Super keen to see how this project pans out! I recently got a spare 4k and k40 gearbox for $20 so a turbo build that I can swap straight into the ke70 is on the cards. Any particular mods to the 32/36? Are you fabricating your own exhaust manifold? Photos, photos, photos!
-
3 months later update: Starter motor went kaput and I had to replace it. Took a bus/train to u-pull-it out of desperation to get another. Had to grease the lobes in the distributor after cleaning it a while back due to screeching, awful noise. Didn't even know they needed grease (apparently, the Internet thinks so). Otherwise, pretty sweet. Roof racks have come in handy numerous times, especially after buying this: Turns out a slant front fits into an empty KE, minus the bumper. Bought all this just in case, the seller was like "you've already got the good front!" Indeed. Here's some photos comparing the RA40 lights I have versus the slanty front ones. I've included a square in case anyone wants to extrapolate dimensions: Also fitted RA40 suspension arms as they are exactly the same as the XT130 arms. Really improved steering and feel, totally recommended (although I'm probably preaching to the converted here...) Did some reorganising of the shed(s) as well, these $15 shelves are nastier than cheap PC cases but surprisingly strong if assembled correctly: Otherwise, nothing. Planning on getting camber tops and 15x8 steelies as I'm sick of takumi tax on wheels and the lack of traction I get with the stock skinny tyres in the wet. Also so I can use the grimy crusty 15" bald-as-ʞ©$ɟ tyres sitting outside for drift/whatever. Yay for daily:


-
No sweat, if you do end up making it take lots of pictures so we can see how its done ;)
-
Standard KE70 seats are awful. I botched in some celica ones that fit me (I'm 6'3) but my car never had to go over the pits... Regarding the plastic cover, you could try and find someone locally that sells clear acrylic sheeting and simply cut/bend your own. Mine is cracked and its on the to-do list.
-
Tach in the KE70 would be the same as in the AE71 I think. The one in the KE is definitely not mechanical.
-
Got to work tearing down the calipers: Pistons are kinda gross: Bore looks OK: Clean out the grooves that the seals sit in. Much clean: Got some seals, initially these couldn't be found. Thankfully the guy at Sprints (an ex brake mechanic for Girling) called around and found them. Gave me some useful tips on putting the calipers back together too. Apparently has also put more of these together than I've had Sunday dinners... Clean up the piston with metho and 800 grit followed by 2000. "Don't use anything but metho", exact words of the Sprints guy :) Clean up the caliper real good with metho: Fit the inner o-ring with a little bit of rubber grease on the inside/outside surfaces: Fit the dust seal with a bit of grease on the lip that sits in the groove on the caliper and the lip that sits in the piston groove: Now, the freaking tricky bit. Grease the lip of the piston and place it square into the caliper and apply compressed air (60psi) to the caliper inlet. After about 10 attempts (much easier the second time), the seal pops and the lip goes above the piston: Now the piston should go straight into the bore with ease: Fit the seals on the carrier: Clean and grease up them pins: Make sure the carrier slides freely. Done! Now that the brakes are done (I hope), ignition needs to be sorted. Kind of got it running again, revs nicely but idles really rough.


-
Someone mentioned something about starting an album of people giving their corollas the bird. Here's my contribution: Loads of fun when the brakes aren't letting it down. Had the brake issue AGAIN tonight after a spirited drive. Lucky for me, I had tools so I was able to fix it to get home (cool off and a quick sand of the pads) Basically, the brake pedal feels much harder and the car brakes on its own before halting altogether. I've read in another thread that it could be a number of problems. Probably going to strip the calipers down and see whats up. Not going to rule out the master cylinder either being the problem. Don't really have the cash to do an ae86 upgrade though I may do this down the track.


-
Day 2 of car being on the road: Sprayed some carby cleaner down the throats and now no stalling. Removed the rattly clamp, exhaust seems to sit fine. Loud as anything though - I need to get a new exhaust manifold :/ Refitted some missing trim. Still some trim to fit though. Had some slight issues with my brakes: Turns out the pads seized in the grooves. A little copper eze sorted that out. Chrome mirrors. Not such a fan of the fender mirror craze :P (though I would like to see if the cheap ones can be modified to be electric... hmm...) And some pics. Need to find out where the hell the rear plate light clips into. Can't find the connector D:


-
Car is 98% done at this point (no photos unfortunately) Seats are in, bumpers, lights, thermo and pretty much everything else is hooked up. Tightened up all the bolts etc. Alignment is done too and the car now has rego. Took the car for a spin. Was interesting, not exactly a powerhouse but handling is awesome I totally get why people like these cars now, having never driven one before - they are freaking raw as anything. Steering and brakes all feel great. Car has a few noticeable issues though: - Dies sometimes when i slow down without blipping the throttle. Not often though, but it did die in peak traffic. - Sometimes the starter won't turn over after this. Not sure if it's something to do with the shims.. - Rattly as heck exhaust. Left one of the clamps undone so will tighten this up. - Oil leak where the fuel pump meets the block. No sign of a fuel leak though. - No speedo. Heh, I think I forgot to put the cable back in right. Thankfully the dash is still semi loose - Car needs a tune real bad. Might have to invest in a dwell meter. - Clutch is kinda heavy though - I think if I ever do another 4k I'll fit a standard one in. Fun times ahead - feels good to have a car again (I've done this entire project with no daily driver...)
-
Gave sodablasting a go with a $30 sandblaster. this is 1 kilo of bicarb: Compared to the old wheel: Pretty cool I think. The wheel is even shinier IRL. Need to get a rear pair of alloys and do the same thing :) Painted both of my bumpers as well: Brakes are also finally done. The brake fluid is probably the original stuff too *bleagh* Getting ready to paint as well: Have a few things to touch up tomorrow before painting commences! And I really need to buy a better camera (sorry for the variable photo quality...). Got my eyes on a DSLR once I'm done :D


-
Have gotten this far with the clutch, using a spacer at the bellhousing. Tried using one, then two and then three hose clamps at the top with no avail. I had issues with the hose clamps slipping a lot before giving out. Trying a stock (non repro) clutch cable also didn't help Can shift fine in gears but reverse still crunches. Might try using a clamp on collar... Fixed up my headlights as well with relays and whatnot. Here is the output now - way, way better than before! Bought a cheapie steering wheel, mirrors and painting supplies. Finally fixed my compressor as well Did some rust repairs too. Not exactly great but it'll do for now. Also found this giant bog hole while poking around. Took a massive chunk of bog out in the process. Urgh. Fiberglass again maybe? Uni is finally finished so I can stuck into it while I apply for work :) Respray coming soon, as well as everything else haha. Just want the damn thing on the road -____-


-
It's a car thing to have that many parts. I reckon most e7 owners have a parts pile or 5. I've got mainly a lot of junk I can't shift, like a seized 4k. I definitely don't have that many wheels though...
-
Yeah I've already bought a bunch of relays and cable and plugs to improve the wiring for the semi sealed 7x5's that are on the way - just being mega lazy on putting it together... I just kinda expected the high beam to be the same as the beam you get when you flash your lights. I'll look into the ceramic plugs as I only bought the bakelite ones. You know, this is actually what I thought of as well! Might pick up a slanty headlight housing and compare them if I can find one cheaply. The globe holders have strange brackets that are designed to go onto the RA40 but without them I reckon they would sit fine on my flat front.
-
a few beers later the lights were flipped and the bumper + hood put on: Hurr durr I am rolla. Will take to those surrounds with a dremel sometime... Swapped my multi indicator switch which fixed the lack of highbeams, although I don't like it how on high it only lights one of the filaments and not both. Guess I'll have to make a workaround for that.

-
I guess i could just trim them back to the silver parts of the surround. The surround seems to be also a little too high, so I was not sure if notching out the beaver panel would mean that they would sit a little lower to allow the hood to close. Not too sure how I'll fit the the globe holders, probably just drill and fit some bolts after measuring it all out (they were zip tied in for that photo...). Wiring with the relays shouldn't be too tricky. Grille would just be a ordinary one cut to size. I was so annoyed, someone took the freaking rear swaybar out of that RA40. I wanted to fit one as per your instructions altezzaclub - I guess I was too late! Also missed out on xt130 lca's, but oh well. I got the quads for $38 all up so I guess I shouldn't complain :) There was also a ra60 celica and I was reminded about your article on fitting up a celica diff into a ke, but I think I'll wait till later for that. Gonna take advantage of the cooler temps. Back to work and 40deg on monday :/
-
So uh, this happened today: Bought them (the quads) veeery cheaply. Came off an RA40 celica. Might try to make them fit later with some different surrounds, or cut out the beaver panel to make them fit. Curious to hear what people think. I really don't want to spend stupid money on quadlights, frankly the $500 or whatever people spend on them these days for JDM points is pretty meh for me. Clear semi sealed lights (7x5) are on the way, bought a replacement indicator multiswitch thing and a driver sunvisor. Still in the process of doing the h4 relay conversion, gotta tidy things up so I don't have ugly wiring and Adelaides unpleasant heatwave has been no help 35 degrees at night makes wiring a frustrating task.

-
Bought a 12" thermo fan kit and stuff for h4 relay conversion: Both of my engine fans had the clutches welded shut so I decided I'd swap for this. Bought new plugs, fixed up the vacuum leaks and did the lean drop method of getting the idle right. Used to only run on 3 cylinders on idle, now runs real smooth. Thermo fan is keeping things very cool (at least for now). Clutch still doesn't disengage which is a PITA. I've seen people use a spacer where the cable goes through the bellhousing so I might try that. Pretty happy with the compression too (this is on all cylinders): Not really sure if this gauge is accurate, but it read 90psi on one of my g11 charades cylinders so I dunno. Seems a bit high for a 4K!


-
Swapped some leads over to get the correct firing order and turned the distributor so #1 was near the head. Bought a cheapo jumpstarter, charged the battery, put some fuel down the carb and turned the key. Engine promptly started firing but didn't run on its own. I think I have too many vacuum leaks :/ Will sort out the leaks tomorrow hopefully. Cheers for the advice altezzaclub, much appreciated :y:
-
Would anyone believe me if I said my car has brembo brakes? I doubt it lol. Made in italy and everything: Got 3m of vacuum hose as well. Me looking at the vacuum hose diagram and attempting to connect things up: Well screw that for now. Bought a nifty oil gauge Also a pair of seats out of a mid 90's celica. Might be a bit of work getting these onto ke rails, but they align up OK. They juuuust squeeze in and are very comfy. I found a ra40 celica at lonsdale upullit, but its seats were traaaaaaashed. My interior as its stands right now: Charged and connected up my battery. Put LED lights into my dash, i think a few are the wrong way round (bought a pack of 6). Otherwise I reckon they look good. Fixed the piss sized ground wire to the engine. Turns over much better than before, but my battery has been sitting for too long and is dead as. Poured some fuel down the carby throat and turned the key (this is the second go, and I'm no movie maker): Not much besides a few pops before my battery died :( Looked at my ignition leads and I don't think they are in the correct order. Spent a while looking for the right way but couldn't find any good photos online. Painted my air filter housing because it was rather crappy looking. Welp, thats it for now. Taking a break for the weekend as I have little money and want to do something else. If anyone could point me in the right direction for the correct order of those ignition leads, that would be great :y:


-
Big ass reply coming in... Uni went into super overdrive the past few months, but exams are finally over. Can really get into it now. Front suspension in (still need to tighten up things): Rear suspension is sorted, control (trailing?) arms came out and bushes replaced after a bit of drilling, raging and prying. No pretty photos yet as i just wanted it rolling! Car is rolling at last: Putting stuff on and checking for water leaks. We'll see how it holds up pressurized.... Up we go: Aligning the clutch: No worries until i began torquing the bolts: High tensile bolts? I think not. Either that, or i am cursed with forever screwing up bolts and things. Crappy nuts and bolts have been the cause of many "ʞ©$ɟ it, i'll go home today" events. Motor is going in..... And in..... Last 10mil was not pleasant. Crane refused to go forward as it was contacting my tyres and LCA's. Had to jack up one side and take off the wheel before I went any further. We're in! (sorry for blur, must have been excited...): Noticed one strut was clunky as hell: Top nut has loosened a fair bit. Sigh, might have to replace it with a new one because I think these are nylocs or something. Ride height on these evilbay kings. Pretty much what I expected and what I want - should be fine for dirt roads and possible trek to the Flinders (dun dun dun....) Replaced the fuel lines, fuel filter and added in hoseclamps. Many things are still not wired in: Added on the front bumper, lights and grille. Bumper is kinda bent so I think I'll replace it. Picked up my rear lights and wondered why something was rattling inside. Turns out: Yum. Good excuse to get some different taillights.... Now dealing with the clutch cable -_____- Originally it went straight to the floor. A quick Google later found that i need to fit spacers, like hoseclamps instead of the E clip. Whatever. Still need to sort out. Not impressed, but I guess I was the idiot for breaking the old one (duh, thought I was gonna fit a 4age. Youths!): Bellhousing shot: Clutch doesn't disegange which is lame. I hope i can fix that.... Picking up new brake rotors tomorrow. Waiting for brake pads, relays for the headlight upgrade, headlight case things, door pins, window regulators and a new rear view mirror. List is no doubt incomplete and I still need to hookup a few things. Gotta swap over the dented drivers side door, clean up some rust and it should be ready next year. Will make a video of first start, with no exhaust of course :)


-
preeety much. i can't fit my crappy ozito grinder in there as the disc/gearbox scuffs along the top of the mount and the edges. I'll have to wait to buy something smaller like a cutoff tool. the steering bush still bugs me. did the steering racks come in different sizes or something? :unsure:
-
Well, things have been progressing slowly. I got a full set of king lowered springs (30mm) and cleaned and refilled the front shocks. Front suspension has been tidied up a bit too and i finally got those darn front LCA bushes in, as well as the strut bars and the swaybar. Now that I've gotten most of the back suspension out, I've gotten stuck with this charming fellow: Yeah, yeah, oh the horror! I've thrown pretty much everything at it - impact on a swivel, breaker bar, heat, grinder etc. I even went out and bought an air saw to try and get in there and cut the bolt inside the mount - nope. I have a feeling the crush tube has rusted to the screw and is making things difficult (on both sides too!). I sprayed some Inox into the mount and around the screw for now (seems like multispray did nothing). Everything else came off fine with the rattle gun! :( Also stuck with a rack bushing (the D one) that doesn't quite fit around the aluminium mount on the rack itself. Seems too wide or something as it doesn't quite wrap around all the way.

-
The bushings are Superpro, I bought a full set on ebay for around $200 and supplemented the kit with some whiteline ones for the front swaybar mounts. My lca bushings are single piece, with a tube in the middle. I'll try and find/cut some pipe just a bit bigger than the bush and try again. The bush does flex like mad when you try and put it in! I purchaed a full oxy kit (CIG australian set) with regs for $150 a while back, just waiting for the cash to rent the cylinders. I can't stand cheap MIGs so I went with it. I'll definately be doing a lot of cutting and grinding as I'm in no rush. The bog was a half assed attempt and I'll definately be chopping it out. I'm probably going to end up doing a respray myself as well (yes, i'm getting ahead of myself!) just because of the rust and the success of other people on the forum. And the paint is terrible. The photos do no justice on how bad the paint is.... I have all the gear (LV spray guns etc) so should be good. I got a replacement 4K cheaply so that will be going in. I tossed up going 4age, but that is out of my budget and league at the moment. The original engine was trashed. Apparently the head was unremovable after blowing the headgasket, but a few turns of the starter locked the motor up completely. I stripped the old block and the pistons had jammed in their bores. :wtf: I have a lot of work to do....


